Estimate cycle time as setup plus queue, move, and processing time, not cut time alone. For a defensible quote, use the median alongside the 85th and 95th percentiles, because the average can hide the jobs that run late.
A customer sends a STEP file at 9 a.m. and wants a price before lunch. The part looks familiar, the stock is available, and your first instinct is to estimate the spindle time from experience. Then you remember the fixture, tool changes, inspection, deburring, outside finishing, and the fact that your machine already has jobs waiting in front of it.
That's where small shops lose money. The machine may cut the part quickly, but the order still consumes labor, floor capacity, handling time, and schedule space. Estimating cycle time well means turning geometry and shop knowledge into a realistic production commitment before you've built the full CAM program.
Table of Contents
Why Cycle Time Estimates Fail in Job Shops
Cycle time isn't the same as machine run time. A useful shop-level estimate includes the work required to make the part move through your operation, including setup, processing, internal movement, waiting, inspection, and any finishing that stands between raw material and an acceptable shipment.
A 2011 manufacturing study describes a cycle-time method that combines effective process times with operation-specific queue-time estimates derived from historical data and the Kingman queueing equation. The point is practical, not academic. In a busy, highly utilized shop, queue time can dominate total cycle time, and changes in variability can alter delivery commitments even when the cutting program hasn't changed. The Winter Simulation Conference paper on historical-data-driven cycle-time estimation documents this approach.

The machine is only one part of the promise
Suppose you look at a machined aluminum housing and think the cutting will take two hours. That estimate might be reasonable for spindle engagement, but it says little about the order's actual path.
You may still need to:
Prepare the job: Review the drawing, order stock, stage tooling, create or modify workholding, and load the program.
Set up the machine: Indicate the fixture, touch off tools, verify offsets, and prove out the first part.
Move and wait: Transfer material between saw, mill, inspection, deburring, and finishing, while accounting for work already ahead of it.
Release the order: Inspect critical dimensions, resolve nonconformances, package the parts, and coordinate outside processing.
A sheet metal job has its own hidden time. Laser or punch time may be short, but nesting, loading, sorting, press brake setup, forming, hardware insertion, welding, deburring, coating, and inspection can determine the actual commitment.
Practical rule: Quote the path a job will travel through your shop, not the one operation that looks most obvious on the CAD screen.
Averages make risky promises
Cycle time is stochastic. Job mix, routing, setup variation, resource availability, yield loss, and process drift all affect the result. An analytical flow-shop model combines mean setup and processing times with their variability, including the squared coefficient of variation, to represent how unstable work inflates predicted cycle time and throughput uncertainty. The University of Maryland flow-shop model explains why a stable average alone isn't enough.
That's why a quote based on the fastest familiar job is dangerous. The customer doesn't experience your ideal run. They experience the order that waits for a machine, needs an extra inspection, or requires a second setup because the first operation didn't provide the access you assumed.
The Hidden Components of Your Cost Model
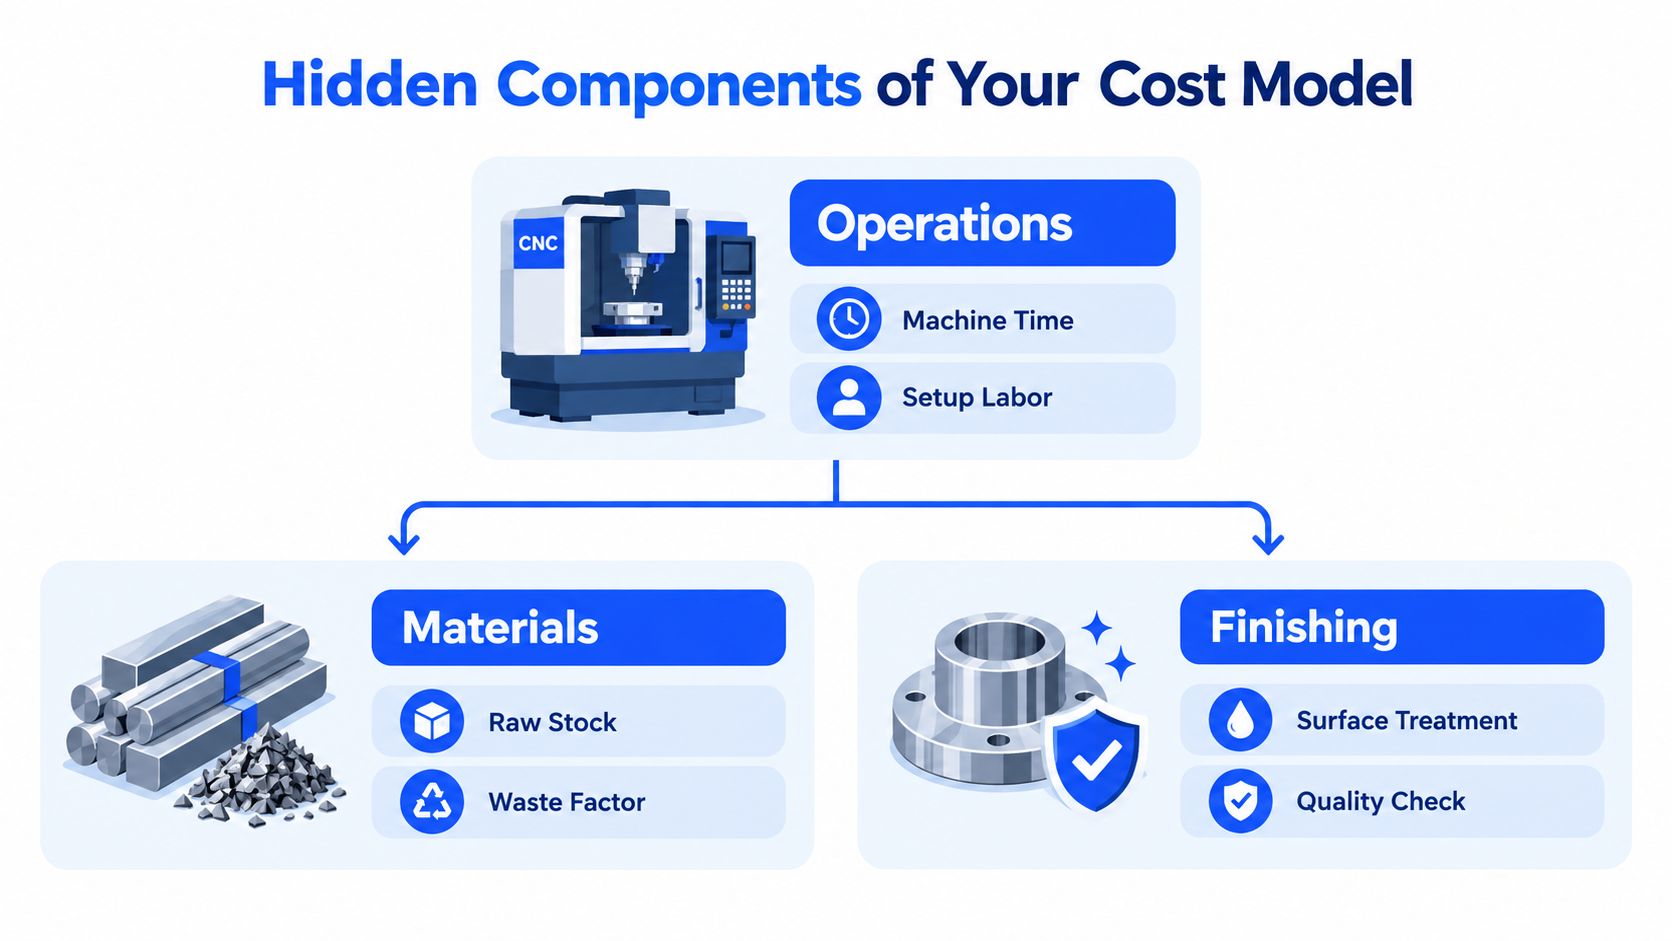
A reliable estimate starts by separating the job into materials, operations, and finishing. These categories interact. Cheap stock can create more saw work or waste, a tight tolerance can add inspection and rework risk, and a finish that looks minor on the drawing can add handling and outside-vendor lead time.
Materials are more than the purchase price
For CNC machining, start with the stock form, dimensions, grade, and availability. A billet that fits the finished envelope may still need extra allowance for clamping, facing, saw cleanup, or distortion control. The material estimate should also account for scrap, remnants that can't be reused efficiently, receiving, identification, and movement to the point of use.
Sheet metal adds different questions. Can the blank nest efficiently? Will grain direction matter? Does the part require a formed feature that changes the blank size? Are purchased inserts, studs, fasteners, or weldments part of the material package?
A practical estimate should record the reason for each allowance. If you add stock because a face must be cleaned up, say so. If you add waste because the material size forces an inefficient nest, record that assumption. Clear assumptions make revisions easier and stop a forgotten allowance from becoming unexplained margin loss. A structured cost structure breakdown for manufacturing quotes can help organize these categories.
Operations consume time in different ways
Machine time is only one operation input. Setup labor may be shared across a batch, while programming, tool preparation, first-article verification, and inspection may happen once per order. A repeat job with a proven fixture can behave very differently from a one-off part with uncertain workholding.
For CNC work, identify roughing, finishing, drilling, tapping, threading, contouring, chamfering, and probing separately. For fabrication, identify cutting, bending, welding, assembly, deburring, and touch-up. Each step has a different driver. Removed volume influences roughing, feature count influences drilling and tapping, bend count influences press brake handling, and weld length influences both execution and cleanup.
Manufacturing models also distinguish the ideal technological cycle from the realistic cycle. One scheduling model calculates operation time from the number of workplaces, shifts per day, norm-hour execution, and capacity per shift, showing why labor calendars and parallel resources affect the estimate. The production-phase duration model provides the underlying framework.
Finishing and quality can decide the quote
Finishing is often treated as a note at the bottom of the drawing. That's a mistake. Anodizing, powder coating, plating, passivation, brushing, tumbling, blasting, deburring, and paint touch-up all add coordination and handling. Even when the outside vendor performs the work, your team still has to package, transport, receive, inspect, and sometimes rework the parts.
Quality checks deserve the same attention. A critical bore, flatness requirement, cosmetic surface, weld profile, or coating specification can require a different inspection method and additional handling. You don't need a perfect process plan to recognize that risk. You do need to include it before the price reaches the customer.
Geometry-Driven Estimating from CAD Files
You can produce a useful first estimate without running a complete CAM strategy. The method is to read the geometry as a collection of features, material-removal demands, handling challenges, and required operations.
Start with the part envelope and stock form. From the CAD model or drawing, identify finished length, width, height, thickness, and any material callout. Compare the finished envelope with realistic stock. A small machined block with modest removal may need one setup. A deep pocketed plate, thin wall, or part with features on several faces may need multiple orientations and more workholding.
Read features before calculating minutes
Break the part into features that your shop already understands:
Faces and steps: Estimate facing and leveling work from the amount of material to remove and the accessible surface area.
Pockets and cavities: Look at depth, corner radii, floor area, wall finish, and whether a smaller tool is needed for the corners.
Holes and threads: Count hole families by diameter and depth. Separate drilling, spot drilling, reaming, tapping, and thread milling where the drawing requires them.
Contours and profiles: Consider perimeter length, outside corners, inside corners, and whether the profile needs roughing followed by finishing.
Chamfers and edge breaks: Group repeated edge work, but don't ignore access problems or manual cleanup.
Thin walls and delicate features: Add a risk allowance for conservative feeds, extra passes, inspection, and possible rework.
The goal isn't to guess a single magic number. It's to build a transparent estimate from recognizable work. Your estimator should be able to point to a feature and explain why it adds time.
Convert geometry into shop operations
Once the feature list is clear, assign an operation family to each group. Estimate roughing from the volume and accessibility of material removal. Estimate finishing from surface area, tolerance, tool diameter, and the number of passes your shop normally needs. Estimate drilling and tapping from feature count, depth, tool changes, chip evacuation, and inspection requirements.
Then add non-cutting time. Include tool changes, rapid moves, probing, loading, unloading, part flipping, fixture changes, chip removal, and first-piece verification. These tasks don't appear as cutting engagement, but the machine and operator still spend time performing them.
For sheet metal, use the drawing to count cut features, bends, hardware, weldments, and finishing requirements. A flat pattern may look simple until the bend sequence forces a special setup or the finished part needs manual straightening. Geometry reveals the work, but your shop history tells you how that work behaves in practice.
Use historical jobs as anchors
Choose completed parts that resemble the new one in material, size, feature mix, tolerance, and routing. Don't compare only by weight or outside dimensions. A light part with many tapped holes may take longer than a heavy block with one simple pocket.
Record the assumptions beside the estimate. Note the intended machine family, number of setups, fixture availability, tool reuse, inspection level, batch size, and finishing route. When the job is eventually run, compare actual times with those assumptions and adjust the corresponding feature family instead of changing the entire estimate blindly.
For a deeper drawing review, use this guide to reviewing engineering drawings. The important habit is to treat the drawing as a production document, not just a dimension sheet.
Manual Methods Versus Software Automation
Manual estimating works well when the shop receives a manageable flow of familiar work and the estimator knows the machines, tooling, and operators intimately. A spreadsheet with operation libraries can be fast for repeat parts. It also keeps the logic visible, which matters when the owner needs to challenge an assumption before the quote goes out.
The weakness appears when RFQs arrive in batches, files are incomplete, or several people quote the same type of work differently. Manual entry can miss a hole pattern, overlook a finish callout, use the wrong material grade, or carry an old setup assumption into a new revision.
What a manual system does well
A disciplined manual system gives you control. You can create standard families for saw cutting, milling, turning, press brake work, welding, deburring, inspection, and outside finishing. You can maintain separate allowances for prototypes, repeat production, urgent work, and difficult materials without pretending that one formula fits every job.
It's also easier to apply judgment manually when the geometry is unusual. A senior estimator may recognize that a thin bracket will distort, a weldment needs temporary tabs, or a five-axis-looking feature can be completed with a clever fixture. Software won't replace that knowledge.
The trade-off is capacity. Every extra RFQ increases the chance that someone skips a field, misreads a drawing, or calculates a per-part time without allocating setup across the batch.
Where automation earns its place
Software can inspect CAD models, drawings, and BOMs more consistently than a person working through a crowded inbox. It can extract dimensions and features, organize material and finishing inputs, apply operation libraries, and preserve the assumptions used to create the quote.
That doesn't mean accepting an automated result without review. The estimator still has to validate workholding, machine access, tooling, tolerance risk, and the routing that the software cannot fully infer from geometry alone. The useful model is human judgment with automated preparation, not an unattended black box.
For shops comparing tools, CNC estimating software for machine shops is relevant when the main bottleneck is turning incoming technical files into a structured estimate. A plumbing estimator may use a different set of assemblies and labor rules, but Exayard plumbing estimating software illustrates the broader principle that estimating systems should reflect the trade's actual work instead of forcing every business into a generic calculator.

Choose based on the failure you need to remove
Use manual tools when your work is specialized, your RFQ volume is modest, and your estimator can maintain the libraries. Consider automation when the shop loses time locating attachments, extracting repeated geometry, transferring data between systems, or rebuilding estimates after design changes.
The right question isn't whether software can calculate faster. It's whether it helps your team capture the complete job, expose assumptions, and respond without sacrificing review. Speed only protects margin when the estimate remains traceable.
Building Traceable Quotes with Versioning
A quote shouldn't be a disposable number in an email. It should be a record of what you understood, what you assumed, and what changed.
Start with a baseline version as soon as the RFQ arrives. Save the source files, material specification, quantities, requested finish, delivery requirement, and the routing you used to form the estimate. If a drawing contains ambiguity, write the assumption directly into the quote record rather than relying on memory or a private note.
Record changes as decisions
When the customer sends a revised drawing, create a new version. Don't overwrite the old estimate and hope the difference is obvious. A useful revision record identifies:
Geometry changes: New holes, altered thickness, deeper pockets, changed bend details, or revised tolerances.
Process changes: A new machine, additional setup, different fixture, outside processing, or inspection method.
Commercial changes: Quantity, delivery date, material availability, freight, markup, or customer-requested substitutions.
Risk changes: Unclear requirements that were resolved, or new requirements that increase the chance of delay or rework.
Versioning protects both sides of the conversation. If the customer asks why the price or delivery changed, you can show which requirement changed and which cost or time assumption followed it. If the shop made the mistake, the record helps isolate it instead of turning the discussion into an argument.
Keep the estimate connected to actual work
After production, compare the estimate with what happened. Don't adjust every line because one job ran late. Identify whether the variance came from setup, cutting, waiting, inspection, finishing, material problems, or rework. Then update the relevant operation rule and keep the original estimate intact.
A repeat customer may send a familiar part with a small design revision. Historical versions let you see whether the change affected a single feature or the entire routing. They also help newer estimators learn from prior decisions without copying outdated assumptions.
A quote history turns experience into a shop asset. Without it, every estimator starts from memory and every margin problem looks like a surprise.
Use approval controls for meaningful changes. The estimator can revise geometry inputs, while an owner or operations lead reviews a large change in lead time, markup, or outside processing. That keeps speed in the front office without allowing silent edits to determine the shop's capacity or profitability.
Controlling Accuracy and Protecting Margins
Accuracy doesn't mean predicting every minute before the job starts. It means knowing which assumptions matter, separating optimistic from realistic outcomes, and making uncertainty visible before the customer commits to a date.
A practical workflow begins with the geometry-driven estimate. Identify material and stock, list the features, assign operations, estimate setup and processing, then add movement, inspection, finishing, and expected queue exposure. Finally, compare the result with similar completed jobs and ask whether the proposed machine and routing are credible.
Quote the range your shop can support
Use at least two internal views of the job. The first is the best practical case, assuming the expected fixture, normal tooling, clean material, and no unusual interruption. The second is the credible risk case, which accounts for a second setup, slower access, additional inspection, outside finishing coordination, or a machine queue.
Don't automatically pass the worst imaginable outcome to the customer. Use the difference to decide whether you need a contingency, a clarification, a different routing, or a delivery promise that leaves room for the shop's actual conditions.
Cycle-time percentiles provide a stronger basis for that conversation than a single average. A 2005 manufacturing simulation study fitted generalized gamma distributions to cycle-time moment curves and inverted those distributions to estimate percentile times such as the 90th and 95th percentiles, reflecting the skewed tail that averages can conceal. The Winter Simulation Conference study on percentile cycle-time estimation supports this risk-aware approach.
Set controls around the estimate
Protect the quote with simple internal checks:
Capacity check: Confirm that the selected machine, press brake, welder, or finishing route can accept the promised work without ignoring existing commitments.
Assumption check: Require a note for unusual stock allowances, special tooling, uncertain tolerances, difficult access, or unconfirmed outside processing.
Batch check: Separate per-order setup from per-part processing so the estimate behaves correctly when quantity changes.
Margin check: Review whether the price still covers labor, material, subcontracting, inspection, handling, and the risk case.
Actuals check: Feed completed-job results back into the operation library, with the reason for each meaningful variance.
Owner's test: If you can't explain where the quoted time goes, you probably don't control the margin yet.
The fastest quote isn't always the one with the shortest response time. It's the one that reaches the customer quickly without committing the shop to a fantasy schedule. A quote built from visible assumptions lets you compete on responsiveness while refusing work that only looks profitable because queue, setup, or finishing time was left out.

If your shop spends too much time turning CAD files, drawings, BOMs, materials, operations, and finishing requirements into a quote, Uptool can organize that RFQ-to-quote work and provide AI-assisted extraction for review. Use it to speed up the first estimate, preserve revisions, and keep your estimator in control of the final cycle-time and margin decisions.